Ubuntu Server(VM)에 XFCE와 TigerVNC를 올려 원격으로 GUI를 쓰려고 했습니다. VNC 접속까지는 됐는데 VNC 화면에서 Firefox가 열리지 않았습니다. 원인이 하나가 아니라 세 겹이었고, 하나를 풀면 다음 문제가 나왔습니다. 실제로 나온 오류와 푼 순서대로 정리합니다.
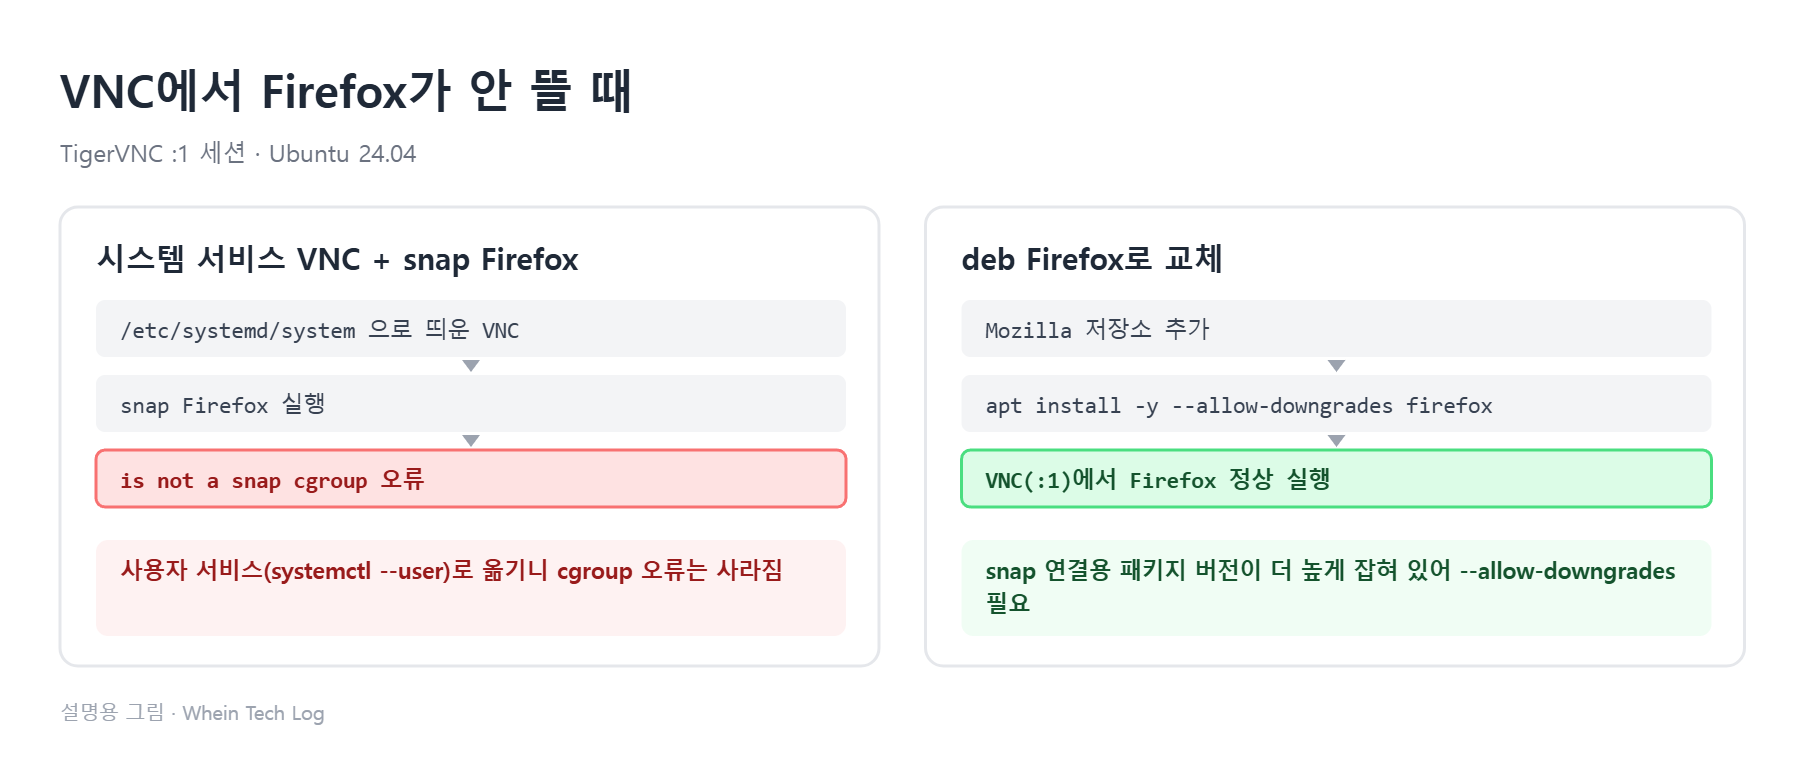
결론
- VNC를 시스템 서비스(
/etc/systemd/system)로 띄우면 snap Firefox가is not a snap cgroup오류로 실행을 거부합니다. 일반 계정의 사용자 서비스(systemctl --user)로 옮기면 이 오류는 사라집니다. - 로컬 콘솔에서 Firefox가 이미 실행 중이면 VNC에서 실행한 Firefox가 콘솔 화면 쪽에 뜹니다. 기존 Firefox를 먼저 종료합니다.
- 그래도
cannot open display: :1.0이 나와서, X 인증과 소켓이 정상인 것을 확인한 뒤 snap Firefox를 deb(Mozilla 저장소)로 교체했고 정상 실행됐습니다. - deb로 바꿀 때 Ubuntu의 snap 연결용 껍데기 패키지가 버전상 더 높게 잡혀 있어
--allow-downgrades가 필요했습니다.
환경
| 항목 | 내용 |
|---|---|
| OS | Ubuntu Server 24.04 (VM) |
| VNC | TigerVNC (Xtigervnc), 디스플레이 :1, 포트 5901 |
| VNC 데스크톱 | XFCE (VNC 세션은 X11) |
| 로컬 콘솔 | GNOME (Xwayland) |
| 브라우저 | Firefox snap → deb 157.0.1 (Mozilla 저장소) |
| 작업 시점 | 2026년 10월 |
호스트명과 계정 이름은 글에서 ubuntu-vnc, user로 바꿨습니다. 로그 시각은 서버 출력 그대로 UTC입니다.
문제 1. snap cgroup 오류로 Firefox 실행 거부
처음에는 VNC를 시스템 서비스로 등록해서 띄웠습니다. VNC 화면의 터미널에서 Firefox를 실행하자 바로 아래 오류가 나왔습니다.
ssh://user@ubuntu-vnc:22
1 ubuntu-vnc
user@ubuntu-vnc:~$
firefox
/system.slice/system-vncserver.slice/vncserver@1.service is not a snap cgroup for tag snap.firefox.firefox
ssh://user@ubuntu-vnc:22SSH2xtermUTF-8
- snap 앱은 실행될 때 자기가 어느 cgroup(프로세스 묶음) 안에 있는지 확인합니다.
- VNC가 시스템 서비스라서 그 안에서 실행한 Firefox도
system.slice아래에 놓였고, snap이 “사용자 세션이 아니다”라며 실행을 거부한 것입니다.
[직접 확인] 오류 메시지의 경로가
system.slice/system-vncserver.slice로, VNC가 시스템 서비스로 돌고 있는 것이 그대로 드러났습니다. 이때 VNC로 접속하면 root 계정으로 로그인되는 문제도 함께 있었습니다.해결: 일반 계정의 사용자 서비스로 전환
[참고 · 직접 확인하지 않음] 기존 시스템 서비스 정리, linger 설정, VNC 비밀번호,
xstartup 작성은 실행 화면을 남기지 못해 TigerVNC·systemd 문서 기준으로 적었습니다. 아래 서비스 유닛 파일과 enable·status 결과는 실제 내용입니다.ssh://user@ubuntu-vnc:22
1 ubuntu-vnc
user@ubuntu-vnc:~$
sudo systemctl disable --now vncserver@1 && sudo rm /etc/systemd/system/vncserver@.service && sudo systemctl daemon-reload
ssh://user@ubuntu-vnc:22SSH2xtermUTF-8
- root로 돌던 기존 시스템 서비스를 끄고 유닛 파일을 지웁니다.
ssh://user@ubuntu-vnc:22
1 ubuntu-vnc
user@ubuntu-vnc:~$
sudo loginctl enable-linger user
ssh://user@ubuntu-vnc:22SSH2xtermUTF-8
- 사용자 서비스는 기본으로 그 계정이 로그인해야 시작됩니다.
- linger를 켜면 재부팅 후 아무도 로그인하지 않아도 사용자 서비스가 올라옵니다.
ssh://user@ubuntu-vnc:22
1 ubuntu-vnc
user@ubuntu-vnc:~$
vncpasswd
ssh://user@ubuntu-vnc:22SSH2xtermUTF-8
- 이 계정으로 VNC에 접속할 비밀번호를 정합니다.
~/.vnc/passwd에 저장됩니다.
~/.vnc/xstartup에는 VNC 세션에서 XFCE를 띄우도록 아래처럼 적습니다. 저장한 뒤 chmod +x ~/.vnc/xstartup로 실행 권한을 줍니다.
#!/bin/sh
unset SESSION_MANAGER
unset DBUS_SESSION_BUS_ADDRESS
exec startxfce4
사용자 서비스 유닛은 ~/.config/systemd/user/vncserver@.service에 만듭니다. 실제로 쓴 내용입니다.
[Unit]
Description=TigerVNC server :%i

[Service]
Type=forking
ExecStartPre=-/usr/bin/vncserver -kill :%i
ExecStart=/usr/bin/vncserver :%i -localhost no -geometry 1920x1080 -depth 24
ExecStop=/usr/bin/vncserver -kill :%i

[Install]
WantedBy=default.target%i에는vncserver@1의1이 들어가 디스플레이:1(포트 5901)이 됩니다.ExecStartPre=-의-는 실패해도 무시하라는 뜻입니다. 남아 있는 세션이 있으면 먼저 정리합니다.-localhost no는 다른 PC에서 직접 접속을 받는 옵션입니다(아래 주의사항 참고).WantedBy=default.target로 사용자 세션이 시작될 때 함께 켜집니다.
ssh://user@ubuntu-vnc:22
1 ubuntu-vnc
user@ubuntu-vnc:~$
systemctl --user daemon-reload && systemctl --user enable --now vncserver@1
Created symlink /home/user/.config/systemd/user/default.target.wants/vncserver@1.service → /home/user/.config/systemd/user/vncserver@.service.
ssh://user@ubuntu-vnc:22SSH2xtermUTF-8
- 새 유닛 파일을 읽고, 자동 시작 등록과 실행을 한 번에 합니다.
Created symlink … default.target.wants가 나오면 자동 시작이 등록된 것입니다.
ssh://user@ubuntu-vnc:22
1 ubuntu-vnc
user@ubuntu-vnc:~$
systemctl --user status vncserver@1
● vncserver@1.service - TigerVNC server :1
     Loaded: loaded (/home/user/.config/systemd/user/vncserver@.service; enabled; preset: enabled)
     Active: active (running) since Mon 2026-10-12 06:37:26 UTC; 6s ago
    Process: 42842 ExecStartPre=/usr/bin/vncserver -kill :1 (code=exited, status=1/FAILURE)
    Process: 42845 ExecStart=/usr/bin/vncserver :1 -localhost no -geometry 1920x1080 -depth 24 (code=exited, status=0/SUCCESS)
     CGroup: /user.slice/user-1000.slice/user@1000.service/app.slice/app-vncserver.slice/vncserver@1.service
             ├─42852 /usr/bin/perl /usr/bin/vncserver :1 -localhost no -geometry 1920x1080 -depth 24
             ├─42853 /usr/bin/Xtigervnc :1 -localhost=0 -desktop "ubuntu-vnc:1 (user)" -rfbport 5901 ...
             ├─42863 xfce4-session
             ├─42901 xfwm4
             ├─42921 xfce4-panel
             ...
Oct 12 06:37:22 ubuntu-vnc vncserver[42842]: vncserver: No matching VNC server running for this user!
Oct 12 06:37:23 ubuntu-vnc vncserver[42852]: New Xtigervnc server 'ubuntu-vnc:1 (user)' on port 5901 for display :1.
Oct 12 06:37:24 ubuntu-vnc spice-vdagent[42943]: vdagent virtio channel /dev/virtio-ports/com.redhat.spice.0 does not exist, exiting
Oct 12 06:37:26 ubuntu-vnc systemd[1924]: Started vncserver@1.service - TigerVNC server :1.ssh://user@ubuntu-vnc:22SSH2xtermUTF-8
active (running)이고,CGroup이/user.slice/user-1000.slice/…로 사용자 세션 아래로 바뀌었습니다.Xtigervnc가ubuntu-vnc:1 (user)로, 즉 root가 아니라 일반 계정으로 실행됩니다.ExecStartPre … status=1/FAILURE와No matching VNC server running은 정리할 기존 세션이 없다는 뜻이라 정상입니다.spice-vdagent … does not exist는 VM에 SPICE 장치가 없다는 메시지로 VNC와는 관계없습니다.
[직접 확인] 사용자 서비스로 옮긴 뒤 VNC는 일반 계정으로 접속됐고, snap cgroup 오류는 다시 나오지 않았습니다.
문제 2. VNC에서 실행한 Firefox가 콘솔 화면에 뜸
이번에는 오류 없이 실행됐는데, 창이 VNC가 아니라 VM 콘솔(로컬 GNOME) 화면에 떴습니다.
ssh://user@ubuntu-vnc:22
1 ubuntu-vnc
user@ubuntu-vnc:~$
echo "$DISPLAY $WAYLAND_DISPLAY $XDG_SESSION_TYPE"
:1.0 x11
ssh://user@ubuntu-vnc:22SSH2xtermUTF-8
- VNC 세션은 디스플레이
:1.0, X11로 정상입니다. Wayland 변수는 비어 있습니다.
ssh://user@ubuntu-vnc:22
1 ubuntu-vnc
user@ubuntu-vnc:~$
pgrep -a firefox
5879 /snap/firefox/9036/usr/lib/firefox/firefox
ssh://user@ubuntu-vnc:22SSH2xtermUTF-8
- 콘솔 쪽에서 snap Firefox가 이미 실행 중이었습니다.
- Firefox는 이미 실행 중인 프로그램이 있으면 새로 뜨지 않고 그 창에 새 창을 엽니다. 그래서 콘솔 화면에 뜬 것입니다.
ssh://user@ubuntu-vnc:22
1 ubuntu-vnc
user@ubuntu-vnc:~$
pkill -f firefox && firefox &
[1] 11736
Gtk-Message: 07:05:50.558: Not loading module "atk-bridge": The functionality is provided by GTK natively. Please try to not load it.
Error: cannot open display: :1.0
ssh://user@ubuntu-vnc:22SSH2xtermUTF-8
- 기존 Firefox를 종료하고 다시 실행하자 콘솔로 가는 문제는 없어졌지만, 이번에는 VNC 화면에 접속하지 못하는 새 오류가 나왔습니다.
문제 3. cannot open display: :1.0
X 화면에 붙지 못한다는 뜻이라 X 인증 정보와 소켓을 차례로 확인했습니다.
ssh://user@ubuntu-vnc:22
1 ubuntu-vnc
user@ubuntu-vnc:~$
echo $XAUTHORITY
/run/user/1000/.mutter-Xwaylandauth.4Z76W3
ssh://user@ubuntu-vnc:22SSH2xtermUTF-8
- VNC 세션인데 X 인증 파일이 로컬 GNOME(mutter) 쪽 파일로 잡혀 있었습니다.
XAUTHORITY=$HOME/.Xauthority firefox &로 VNC용 인증 파일을 지정해 다시 실행해도 같은 오류가 났습니다.
ssh://user@ubuntu-vnc:22
1 ubuntu-vnc
user@ubuntu-vnc:~$
xauth -f ~/.Xauthority list | grep ":1"
ubuntu-vnc:1  MIT-MAGIC-COOKIE-1  <쿠키값 생략>
ubuntu-vnc/unix:1  MIT-MAGIC-COOKIE-1  <쿠키값 생략>
ssh://user@ubuntu-vnc:22SSH2xtermUTF-8
~/.Xauthority에 디스플레이:1용 인증 쿠키가 있습니다. 인증 정보는 정상입니다.
ssh://user@ubuntu-vnc:22
1 ubuntu-vnc
user@ubuntu-vnc:~$
ss -xl | grep "X11-unix/X1"
u_str LISTEN 0      4096       /tmp/.X11-unix/X1 31320   * 0
u_str LISTEN 0      4096      @/tmp/.X11-unix/X1 31319   * 0
ssh://user@ubuntu-vnc:22SSH2xtermUTF-8
- VNC X 서버가 일반 소켓과 추상 소켓(
@)을 모두 열고 있습니다. 소켓도 정상입니다.
[직접 확인] 인증 쿠키와 X 소켓이 모두 정상이었습니다. 서버 쪽 문제가 아니라고 보고, snap 격리 환경을 피하기 위해 Firefox를 deb 버전으로 바꾸기로 했습니다. snap 쪽의 정확한 원인까지는 확정하지 못했습니다.
해결: snap Firefox를 deb(Mozilla 저장소)로 교체
[참고 · 직접 확인하지 않음] snap 삭제와 Mozilla 저장소 등록 명령은 실행 화면을 남기지 못해 Mozilla 공식 안내 기준으로 적었습니다. 아래
apt policy 결과 두 개는 실제 출력입니다.ssh://user@ubuntu-vnc:22
1 ubuntu-vnc
user@ubuntu-vnc:~$
sudo snap remove firefox
ssh://user@ubuntu-vnc:22SSH2xtermUTF-8
- snap으로 설치된 Firefox를 지웁니다.
ssh://user@ubuntu-vnc:22
1 ubuntu-vnc
user@ubuntu-vnc:~$
sudo install -d -m 0755 /etc/apt/keyrings && wget -q https://packages.mozilla.org/apt/repo-signing-key.gpg -O- | sudo tee /etc/apt/keyrings/packages.mozilla.org.asc > /dev/null
ssh://user@ubuntu-vnc:22SSH2xtermUTF-8
- Mozilla APT 저장소 서명 키를 받아 둡니다.
ssh://user@ubuntu-vnc:22
1 ubuntu-vnc
user@ubuntu-vnc:~$
echo "deb [signed-by=/etc/apt/keyrings/packages.mozilla.org.asc] https://packages.mozilla.org/apt mozilla main" | sudo tee /etc/apt/sources.list.d/mozilla.list > /dev/null
ssh://user@ubuntu-vnc:22SSH2xtermUTF-8
- Mozilla 저장소를 APT 목록에 추가합니다.
ssh://user@ubuntu-vnc:22
1 ubuntu-vnc
user@ubuntu-vnc:~$
printf 'Package: *\nPin: origin packages.mozilla.org\nPin-Priority: 1000\n' | sudo tee /etc/apt/preferences.d/mozilla && sudo apt update
ssh://user@ubuntu-vnc:22SSH2xtermUTF-8
- Firefox를 Ubuntu 저장소가 아니라 Mozilla 저장소에서 받도록 우선순위를 줍니다.
- 이 설정이 없으면 Ubuntu 저장소의 snap 연결용 패키지가 다시 설치될 수 있습니다.
ssh://user@ubuntu-vnc:22
1 ubuntu-vnc
user@ubuntu-vnc:~$
apt policy firefox | head -3
firefox:
  Installed: 1:1snap1-0ubuntu5
  Candidate: 157.0.1~build1
ssh://user@ubuntu-vnc:22SSH2xtermUTF-8
- 설치된 것은 Ubuntu의 snap 연결용 껍데기 패키지(
1:1snap1-0ubuntu5)였고, deb157.0.1은 후보로만 잡혀 있었습니다. - 앞의
1:(에포크) 때문에 껍데기 패키지가 버전상 더 높게 취급돼 그냥 설치하면 바뀌지 않습니다.
ssh://user@ubuntu-vnc:22
1 ubuntu-vnc
user@ubuntu-vnc:~$
sudo apt install -y --allow-downgrades firefox
ssh://user@ubuntu-vnc:22SSH2xtermUTF-8
- 버전 번호상 “다운그레이드”로 보이는 교체를 허용해서 deb 버전을 설치합니다.
ssh://user@ubuntu-vnc:22
1 ubuntu-vnc
user@ubuntu-vnc:~$
apt policy firefox 2>/dev/null | head -3
firefox:
  Installed: 157.0.1~build1
  Candidate: 157.0.1~build1
ssh://user@ubuntu-vnc:22SSH2xtermUTF-8
Installed가157.0.1~build1로 바뀌면 deb 버전으로 교체된 것입니다.
[직접 확인] deb 버전으로 바꾼 뒤 VNC 화면에서 Firefox가 정상으로 실행됐습니다.
주의사항
-localhost no는 5901 포트를 모든 네트워크에 엽니다. 내부망이라도 방화벽으로 접속 PC만 허용하거나,-localhost yes로 두고 SSH 터널(ssh -L 5901:localhost:5901 …)로 접속하는 것이 안전합니다.- 사용자 서비스로 바꾸면 root에서
systemctl restart vncserver@1을 해도 서비스를 찾지 못합니다. 관리할 때는 그 계정으로systemctl --user를 씁니다. - Firefox 외에 다른 snap 앱도 VNC 세션에서 비슷하게 동작할 수 있습니다. VNC로 GUI 작업을 많이 한다면 브라우저는 deb 버전을 쓰는 편이 덜 번거롭습니다.
정리
is not a snap cgroup오류는 VNC가 시스템 서비스로 돌기 때문이다. 일반 계정의 사용자 서비스로 옮긴다.- VNC에서 띄운 창이 콘솔에 뜨면 이미 실행 중인 같은 프로그램이 있는지
pgrep으로 확인한다. cannot open display가 나오면XAUTHORITY,xauth list, X 소켓을 확인하고, 정상이면 snap Firefox를 deb로 바꾼다.- deb 교체 때 snap 껍데기 패키지가 남으면
--allow-downgrades로 설치한다.
관련 글: Ubuntu 24.04 TigerVNC “Unit vncserver@1.service not found” 해결 — systemctl –user 사용자 서비스 확인
VNC에서 다른 앱이 비슷하게 막혔다면 댓글로 오류 문구를 남겨 주세요.